2. Click file in the top left hand corner
 3. This will open the Account Settings Dialog
4. Select your desired email address and click ‘Change…’
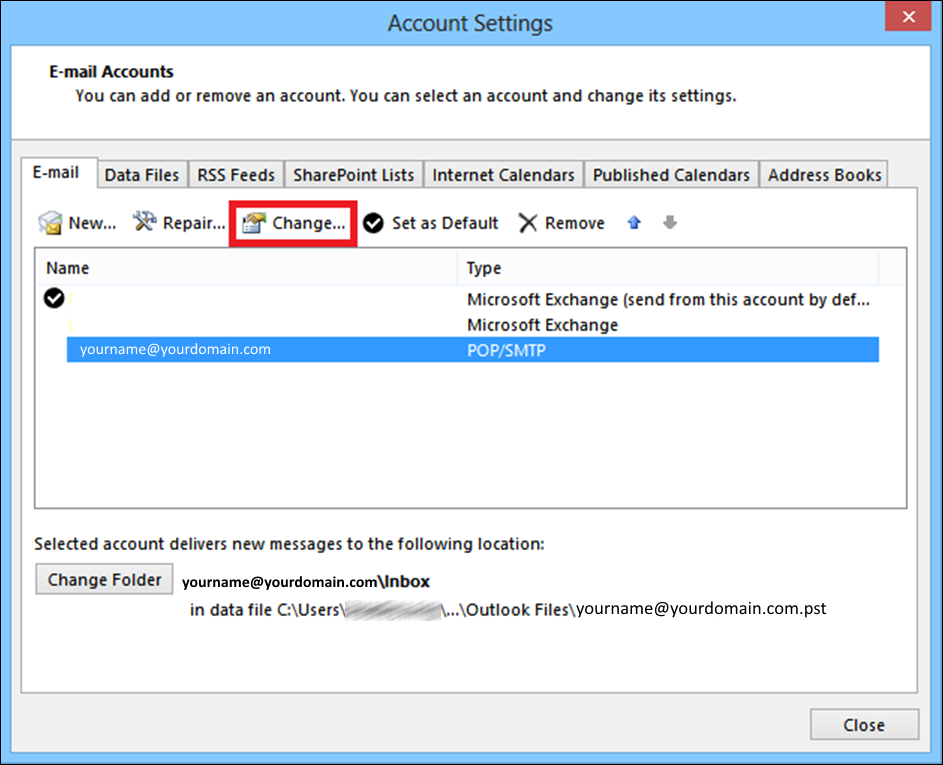 Once you have completed the above steps, you will see a screen similar to the one below. Below this screenshot, you will find a table containing all of the required information. Please use this table, to fill out the fields as per our screenshot.
Here you can see your email account settings.
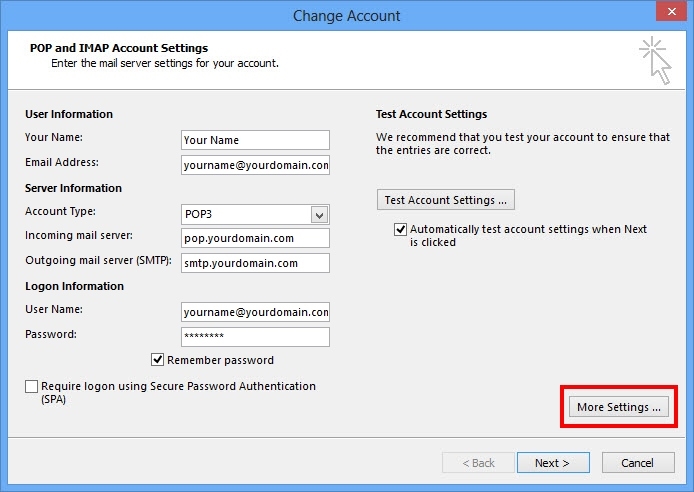
Once you have inserted this information, please click on More Settings, as highlighted in the above screenshot. This will open up a new window. Click on the Outgoing Server tab, highlighted in the below screenshot.
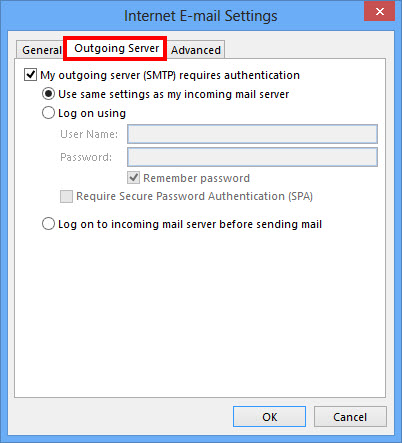
As per the below example, tick the box marked My outgoing server (SMTP) requires authentication, and select the bullet point Use same settings as my incoming mail server:
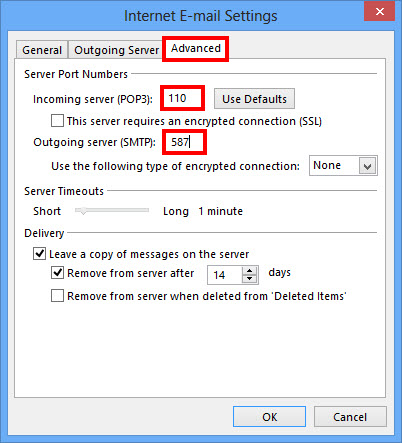
 Once you have done this, please click on the Advanced tab, this will then switch to a screen similar to below. Please ensure the ports are set to 110 (for Incoming) and 587 (for Outgoing) as per the below example:
 After you have done this, click OK to go back to the main settings screen. You can then click Test Account Settings to double check everything is OK, or just click Next and then Finish.