
Setting up Cloud email on iPhone's & iPad's
Please Note: This refers to our Cloud Hosting platform. The guide follows settings for a POP configuration which is the most common type of email setup, however if your interested in using an IMAP setup please follow the guide, but refer to the table at the bottom of this article for settings pertaining to IMAP.
Video Guide
To setup POP or IMAP email on an Apple iPhone, iPad, or iPod Touch, please follow the steps below:
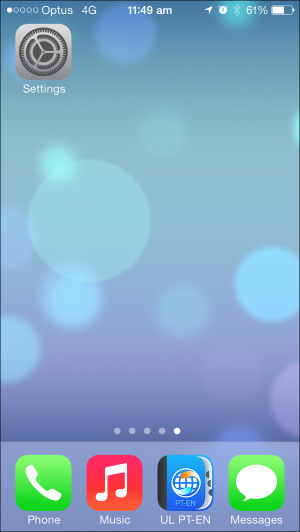
1. From the home screen of your iPhone/ iPad, press the Settings icon:
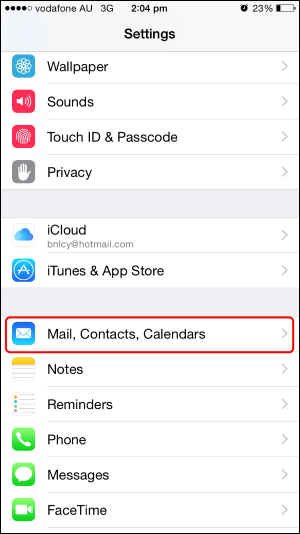
2. Then select Mail, Contacts, Calendars:
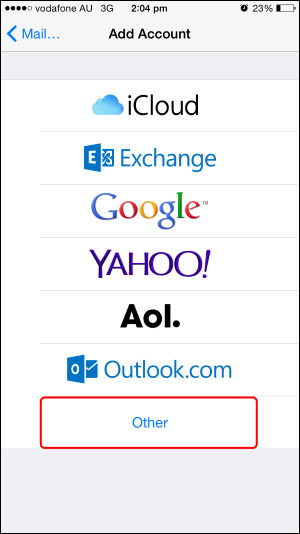
3. Now select Other:
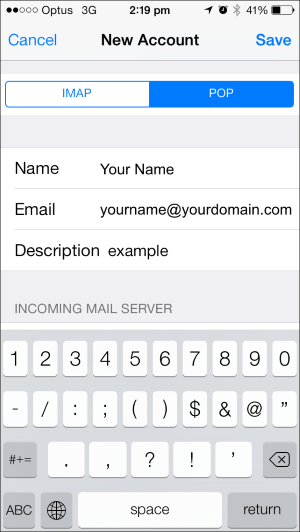
4. You'll now be prompted to fill in the settings to connect to your mailbox:
Your Name: The name to be displayed when sending email
Address: Your email address, e.g. [email protected]
Password: The password used for this email account.
Description: Any text description
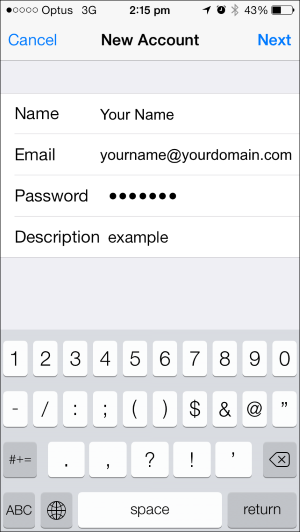
Once you've completed this, hit Next .
The device may now attempt to automatically connect to the server. If this fails, you'll be prompted with another screen to add some more information.
Follow the below instructions if this happens:
1. On this screen, select POP or IMAP, depending on your preference:
2. Scroll down the screen, and complete the Incoming Mail Server settings:
Host Name: pop.yourdomain.com (if connecting via POP) or imap.yourdomain.com (if connecting via IMAP).
Username: Your full email address, eg. [email protected]
Password: The password to your email address
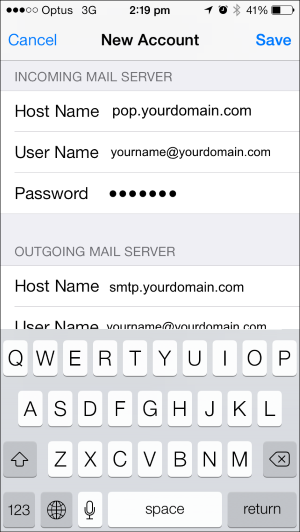
3. Continue to scroll down, and now complete the Outgoing Mail Server settings:
Host Name: smtp.yourdomain.com
Username: Your full email address, eg. [email protected]
Password: The password to your email address
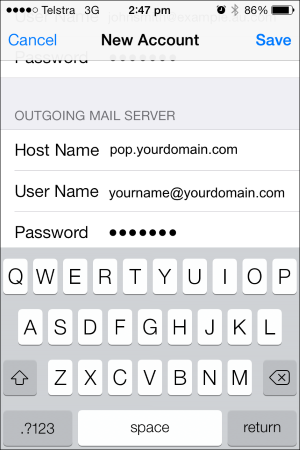
4. Once you've completed this, scroll back up to the top of the screen and press Save. Your device will try and connect to the server again.
Note: At this point, you may get a message that the device cannot connect via SSL, or that the "identity cannot be verified":
If this warning comes up, you may simply press continue.
This completes the setup of mail on your Apple device. However, sometimes iPhones or iPads can automatically select some settings which can cause problems. We recommend taking the below steps to ensure the correct settings are in place:
1. From the home screen of your iPhone/iPad, press the Settings icon.
2. Select Mail, Contacts, Calendars.
3. The email account you just created will be displayed in the Accounts section.
4. Select the email account you just created.
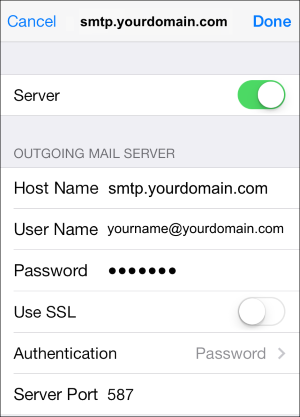
5. Scroll down the screen to find the Outgoing Mail Server heading and press SMTP:

6. On the next screen, ensure your primary server is set to smtp.yourdomain.com
Please click on the server to configure it further:
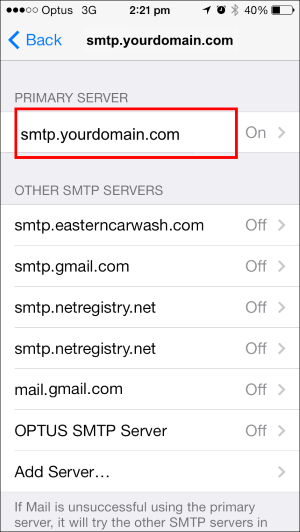
Ensure the below settings are selected:
SSL: Off.
Authentication: Password.
Server Port: 587.
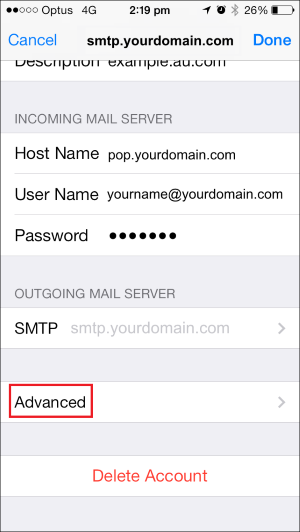
7. Finally, let's check that the Incoming Mail settings are correct. Go back to the mail email account page and press Advanced rather than SMTP:
Adjust the settings, so that they match with the below, if they aren't already setup:
SSL: Off.
Authentication: Password.
Server Port: 110.
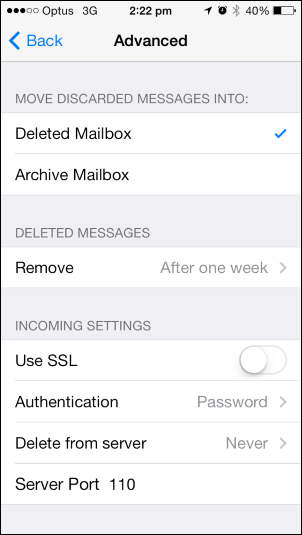
From this screen, you may also allow your device to delete emails from the server when it downloads them or set them to delete after a set period of time.
Once you've finished choosing which of these settings you'd like, you're all done!
Updated 3 days ago