
Configuring your email client with cPanel

The good news is that you won’t have to move your emails yourself. The only thing you’ll need to do is update the settings in your mail client. Please see below for an overview of the changes to make. If you are unsure of how to adjust any of these settings, please refer to one of our detailed guides


How do I manage my email accounts on cPanel?
Managing your email accounts with cPanel is easy. The first step is logging into your cPanel service with Melbourne IT. After that you can modify/create email accounts.
Logging into cPanel
- Log into your MyAccount
- Under Manage Services, click View Webhosting Services
- On the next page, click on the domain name’s cPanel Hosting product
- On the next page, click Manage Service
- A new window will open, click cPanel
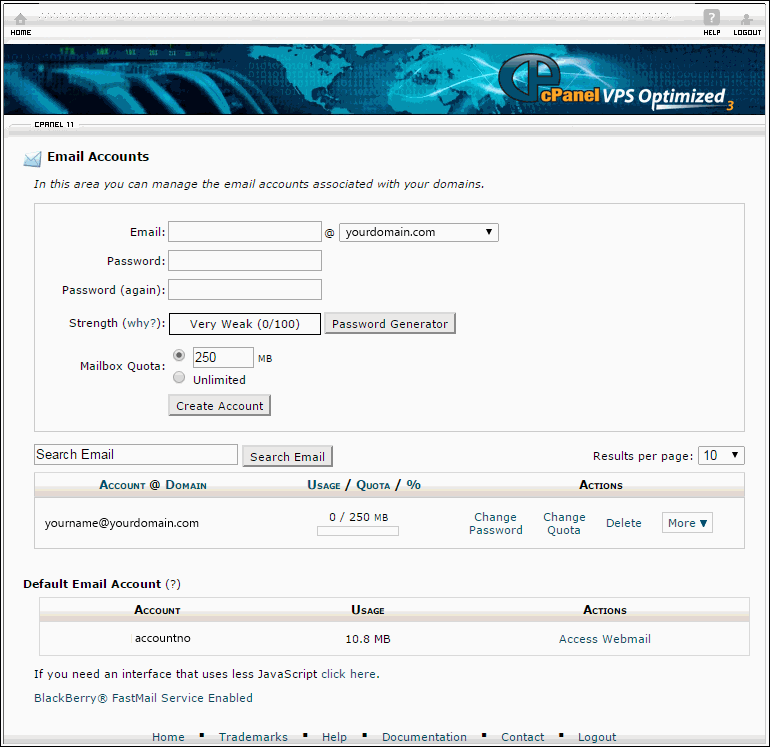
Adding a new email account.
- Click on the Email Accounts icon from within the cPanel interface
- Fill in the fields provided
- Select the size of the email inbox you are creating
- Click 'Create Account'
How to change the password of an email account.
- Click on the Email Accounts icon from within the cPanel interface
- Locate the email account you wish to edit.
- Simply click on 'Change Password' listed next to your email account.
- Set a new password.
- Please note: You will need to set a password which has a strength exceeding 50. A progress bar will pop up indicating your passwords strength.
How to login to Webmail
- Head over to webmail.yourdomain.com
- This will load you Webmail interface.
- Simply enter your email address and password
- You will then have the option of using three different Webmail interfaces
Updated 2 months ago