
How to add a new user to Office 365
In the following article we will take a look at how to create a new user with Office 365. You'll go through this process if you're planning on creating new mail accounts for your employees.
Head over to portal.office.com and login with your credentials supplied by Melbourne IT.
The Office 365 portal is broken up into various different tiles. Look for the Admin tile and click on it. The Admin tile will let you configure different aspects of your Office 365 configuration.
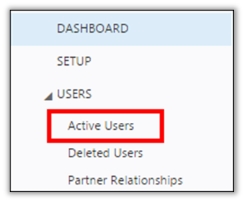
On the left hand side in the navigation bar under Users you'll see Active Users. Click on this, it will take you to a list of Active Users here you can simply add another user.
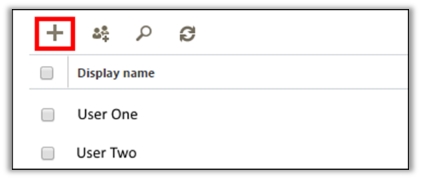
Click on the plus icon, this will launch a widget which allows you to create a new account.
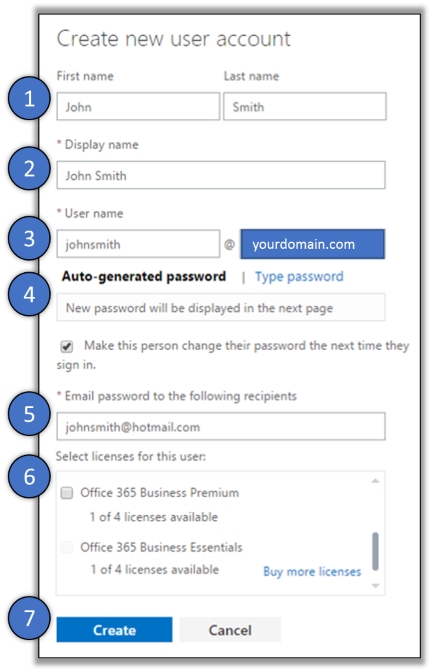
1. Enter your first name and last name
2. Enter your display name, this will be shown to email recipients
3. Enter the prefix of the email address you would like to create
4. You can enter your own password or use the auto-generated version
5. You can choose where to send the new email address log in details to.
6. Select the type of licence you wish to assign to the mailbox.
7. Hit Create to finish adding the new user.
• If you purchased a ‘Essentials’ plan then you should select ‘Business Essentials’
• If you purchased a ‘Premium’ plan then you should select ‘Business Premium’
If you want to add more users you'll need to purchase additional mailboxes, contact our friendly Sales Team on 1300 793 248.
Updated 2 months ago