
POP Email setup for Android
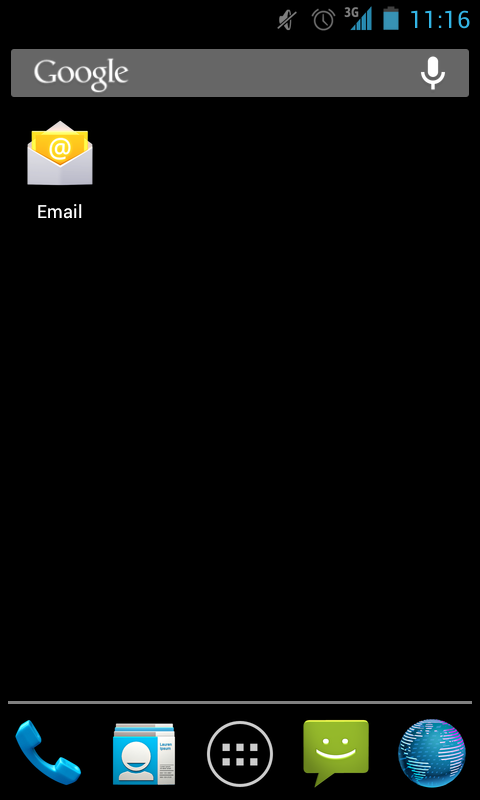
Step 1: Open the Email application on your phone:
Step 2 Account Setup.
You will start in the Account setup page. Add your email address and password and then select Manual Setup.

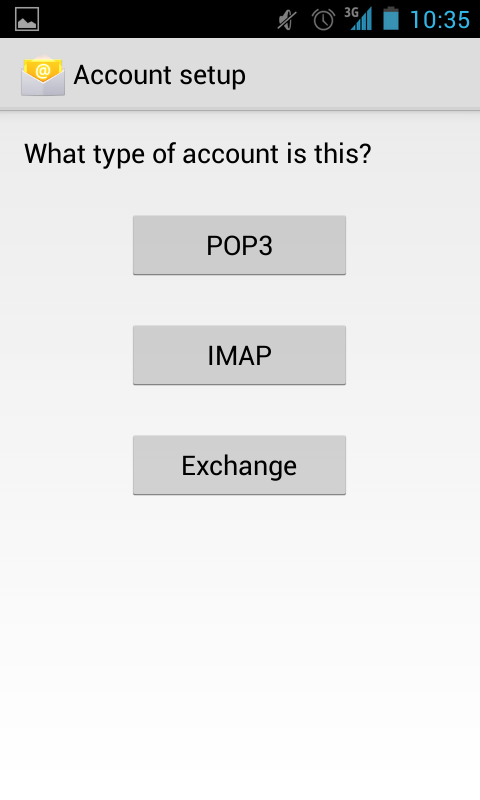
Step 3 Mail Type.
Select POP 3
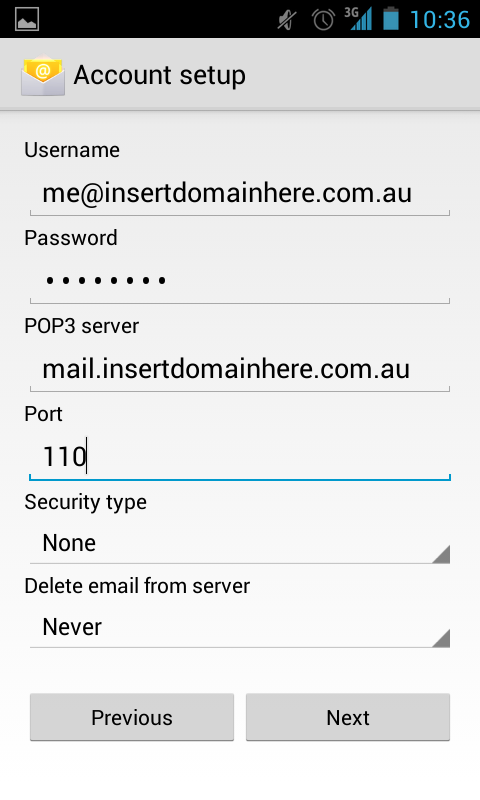
Step 4: POP3.
Fill in your incoming POP3 Email settings in the following layout then press Next.
Username same as your email address
Password your email password
POP3 server will bemail “dot” your domain name (example mail.melbourneit.com.au)
Port 110
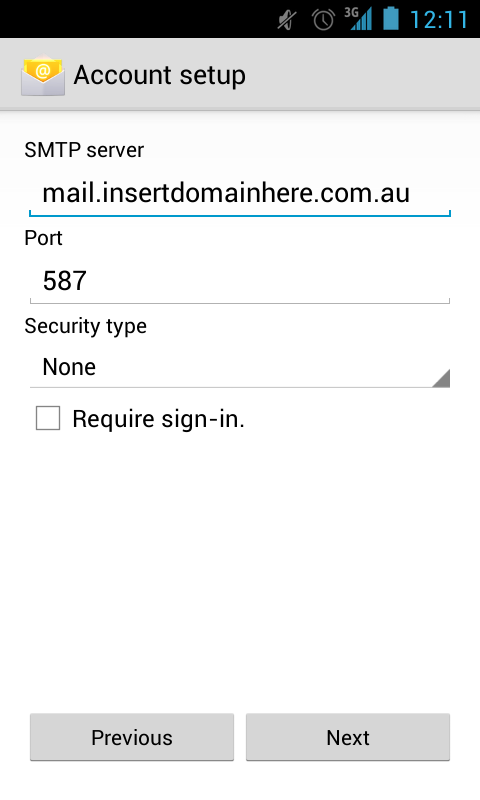
Step 5 SMTP.
Fill in your outgoing SMTP Email settings in the following layout then press Next.
SMTP server will bemail “dot” your domain name (example mail.melbourneit.com.au)
Port 587
Security type None
Require sign-in De-select (un-tick)
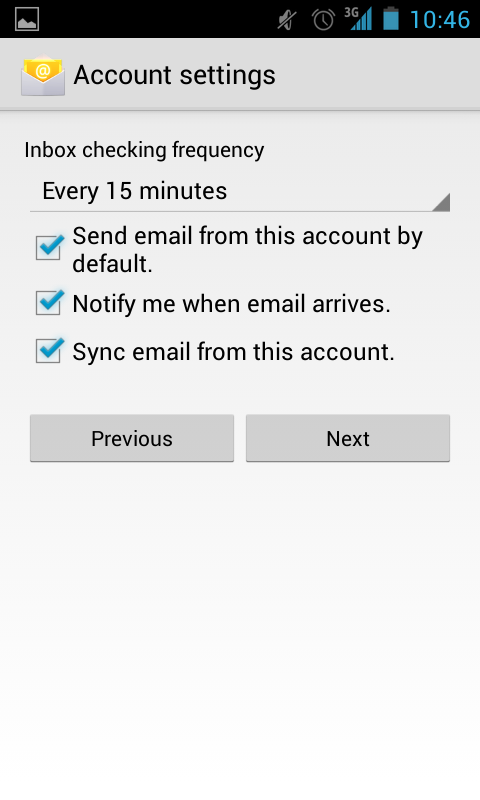
Step 6 Preferences.
Select your mail delivery preferences then press Next.
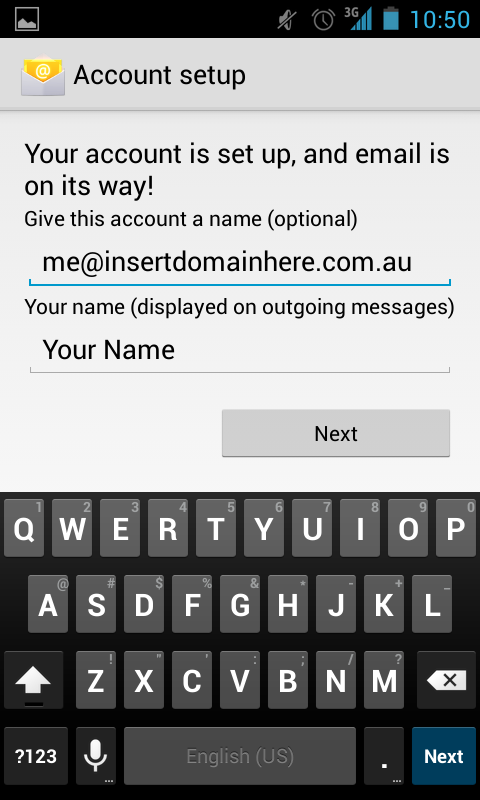
Step 7 Display name.
The final step is to add the name you want to display to recipients when you send them emails, this is typically your name, then press Next. Your mailbox is now set up on your Android 4.2.x device!
Updated 2 months ago