
Creating new Managed Exchange mailboxes
The first step to getting your new Managed Exchange Email setup is creating your Mailboxes. To do this we will need to log into Mission Control.
Logging into Mission Control
- Log into your Melbourne IT MyAccount
- Click on 'Manage Services' in the left-hand side of the page.
- Select your Managed Exchange product.
- You may be prompted for a username and password, you can find your VS number & password on this page.
Alternatively you can always sign in to Mission Control via https://mc-au.server-secure.com. Enter your username (it should resemble VS123456) and your password and you’ll be taken to the Mission Control Home Page.
Now that we are inside of Mission Control we can start creating email accounts.
Creating Mailboxes
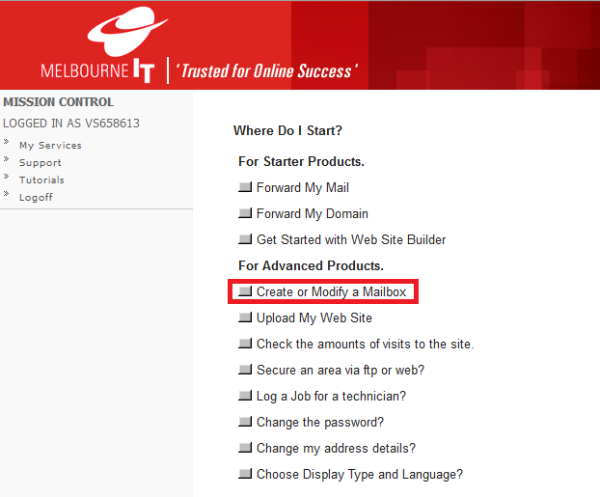
Click the Create or Modify a Mailbox link.
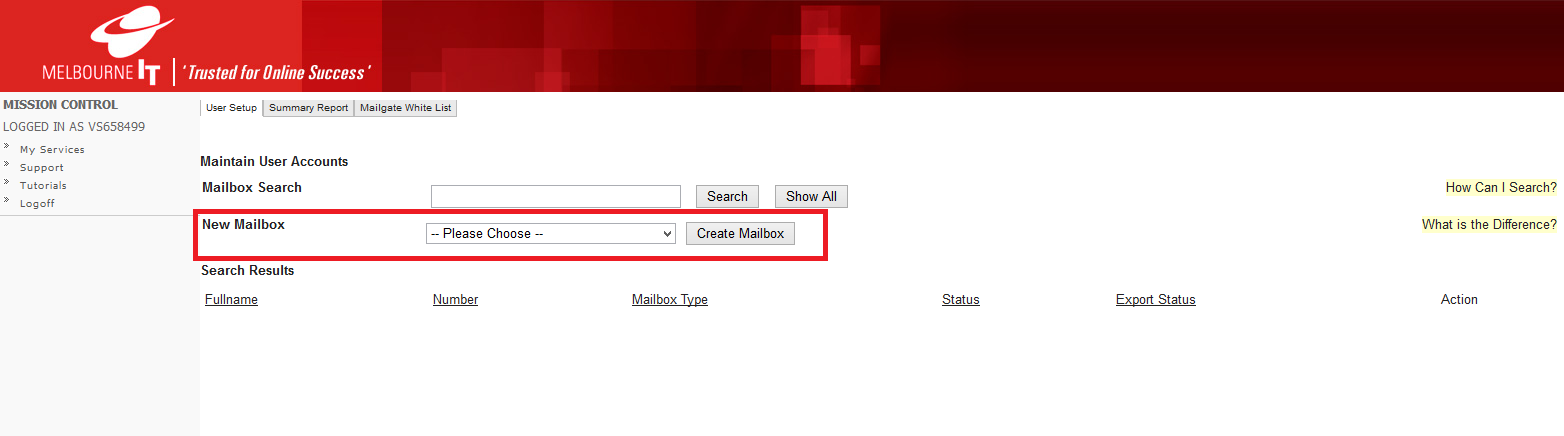
In the New Mailbox section, select a mailbox type from the drop-down box. The options are as follows*:
Options
| Name | Price (monthly) | Data allocation | Notes |
|---|---|---|---|
| Mobile Business | $5.95 | 4GB | Web access only |
| Small Business | $12.95 | 10GB | Can be setup in Outlook |
| Small Business Premium | $19.95 | 25GB | Can be setup in Outlook |
*These prices are correct at time of writing. For the most up to date prices, please visit http://melbourneit.com.au.
Once you have selected a mailbox type, click Create Mailbox.
Details
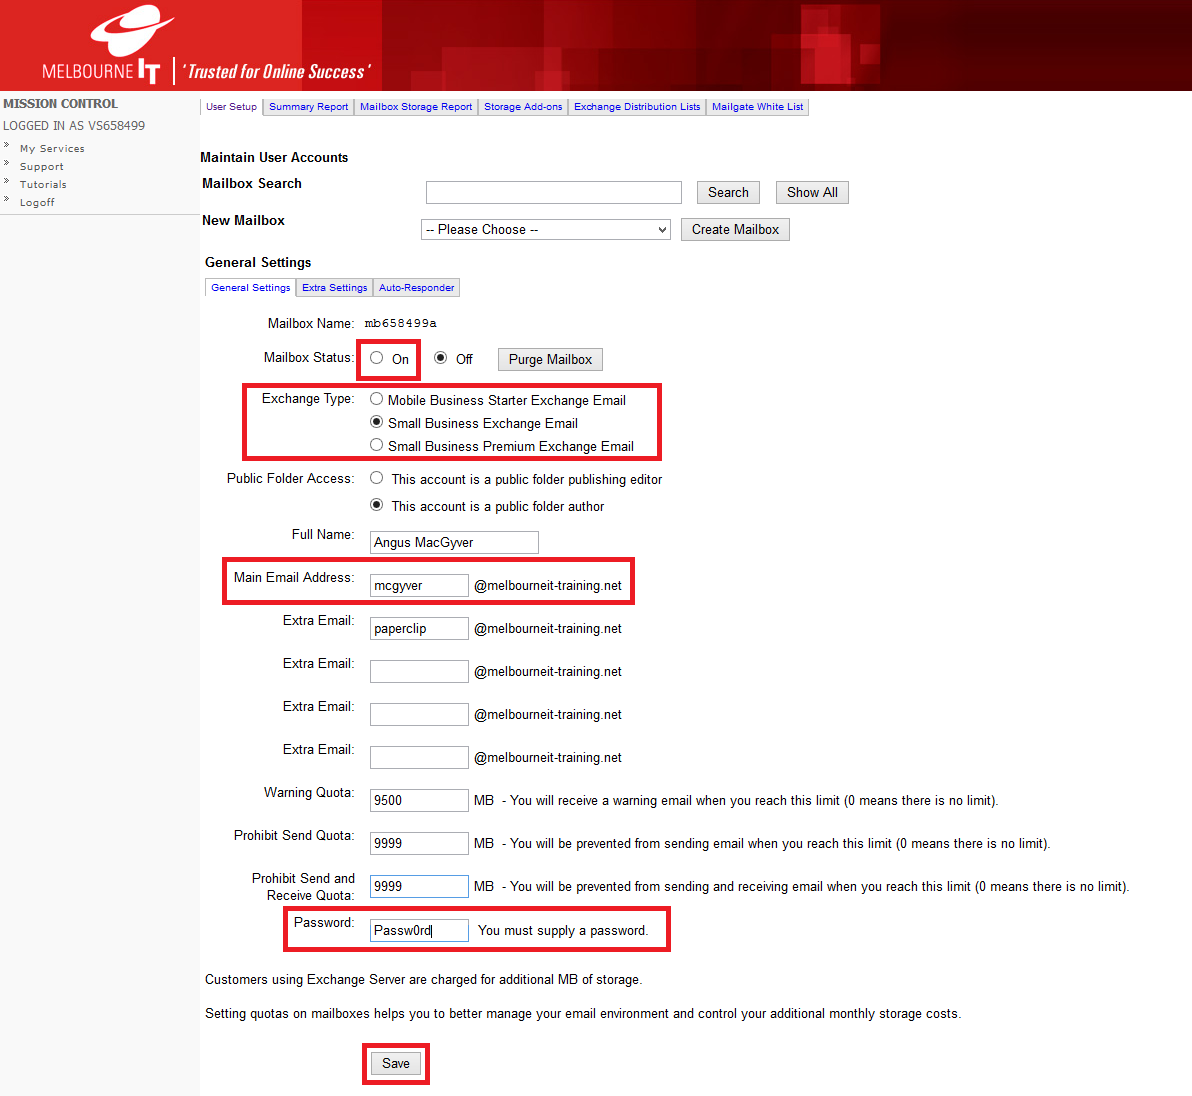
Set the required details in the sections highlighted above, as a minimum. Check the following settings:
- Mailbox Status is On
- Exchange Type is the level of mailbox you desire
- Mail Email Address is the email address you want to create
- Password has been entered
*Please note that this is the same place you would reset a mailbox's password if required.
You can also set the other settings, if needed. We recommend setting the Warning Quota to be 50mb under your quota,and setting the Prohibit Send and Receive Quota to 1mb under your quota. This will prevent you from exceeding your allocated storage for the mailbox (which would incur excess data storage charges, if it were to happen).
As an example, the mailbox we have created here has 10gb (10,000mb) of storage. We’ve set the Warning Quota to 9,550mb, and the Prohibit Quota to 9,999mb.
Once the settings are as desired, click Save.
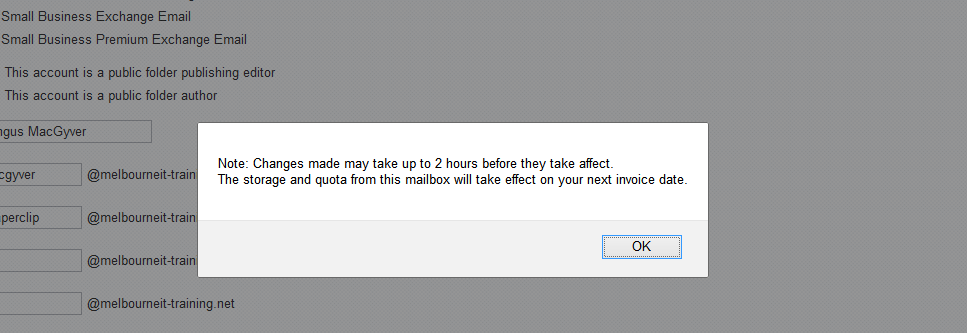
Assuming the required fields have been filled correctly, this popup will appear advising you that the mailbox will take up to two hours to become active. Click OK.

As you can see, the mailbox now exists. The Export Status column will tell you when the mailbox is ready to be used; this will change from Pending Update to Operational once the automatic setup has completed and the mailbox is ready to be setup in your mail client.
Please see the 'Email' category for articles/guides pertaining to adding your Managed Exchange email account to your Email Client/Device.
Updated 2 months ago